Alias management
Each conference has an alias, an email address that redirects to one or more preexisting email addresses contained in it.
This alias is based by default on the short name of your conference followed by @sciencesconf.org.
When using the Mailing module, recipients will see this address as sender. In addition, if you want to be contacted directly through a generic address, the alias allows to redirect the received emails to the email addresses of several recipients.
You also have the possibility to create new aliases, in order to meet your needs, such as having an alias specific to the administrative part.
Create a new alias
In Email Management > Alias, click on the drop-down list at the end of the list, click on “Create a new alias” and enter the desired name. This will be prefixed with the short name of your conference, followed by “@sciencesconf.org”.

In the “Recipient” section, add valid addresses, they will appear at the bottom of the page in the Recipient section.
Complete the action by clicking on Add Alias.
Change the alias addresses
In *Mail Management > Alias *, choose the appropriate alias and add valid email addresses in the Recipient section. They will appear at the bottom of the page in the Recipient section.
The crosses on the right of each email address allow you to delete these addresses.
Complete the action by clicking on “Change Alias”.
Delete an alias
In Mailing management > Alias, you will find the `Delete alias` button.
Note
All manually created aliases can be deleted except the one created by default by Sciencesconf.
If you do not want this alias to appear in the contact email address, the site administrator or webmaster can go to Website > General and change the line «contact address».
Appearance management
Managing the appearance of emails can be found in Managing Mails > Appearance.
You’ll have the ability to customize the email header using the text editor or HTML mode.
You can also choose the font that will be used in the sent emails.
Finally, you can choose whether or not to add the predefined footer in Sciencesconf.
Models
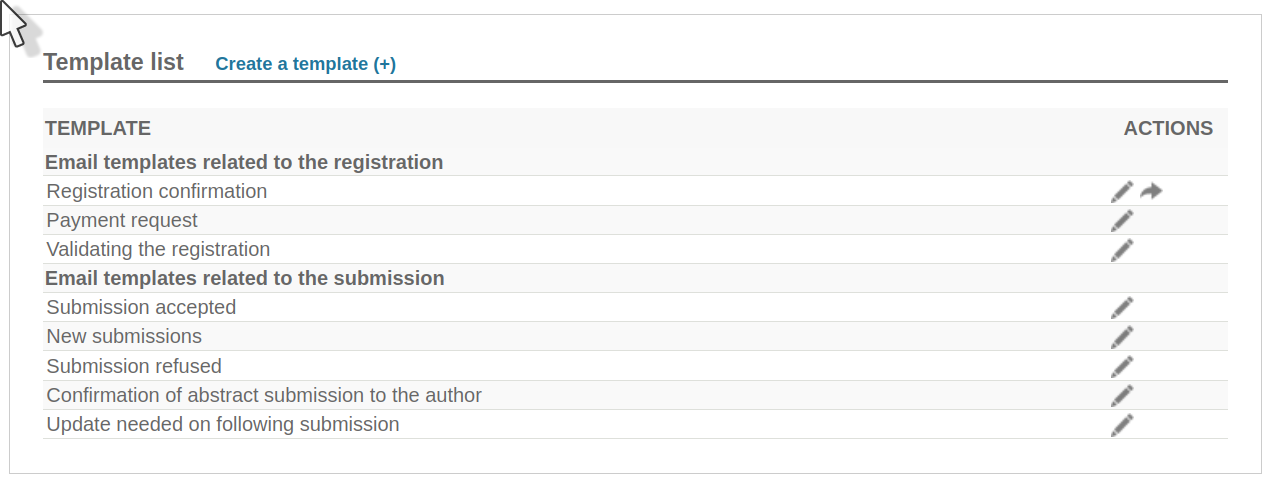
Sciencesconf has created several email templates related to either registration or deposit:

Creating and modifying templates
If you want to create new templates, click on “Create Template”.
If you want to change these templates, click the pencil icon to the right of each line.
You will find a text editor that will allow you to change the title and content of each template.
If you want to return to the original template, click the arrow to the right of the pencil.
Management of predefined lists
If you want to create recipient lists, go to Email management > Predefined Lists.
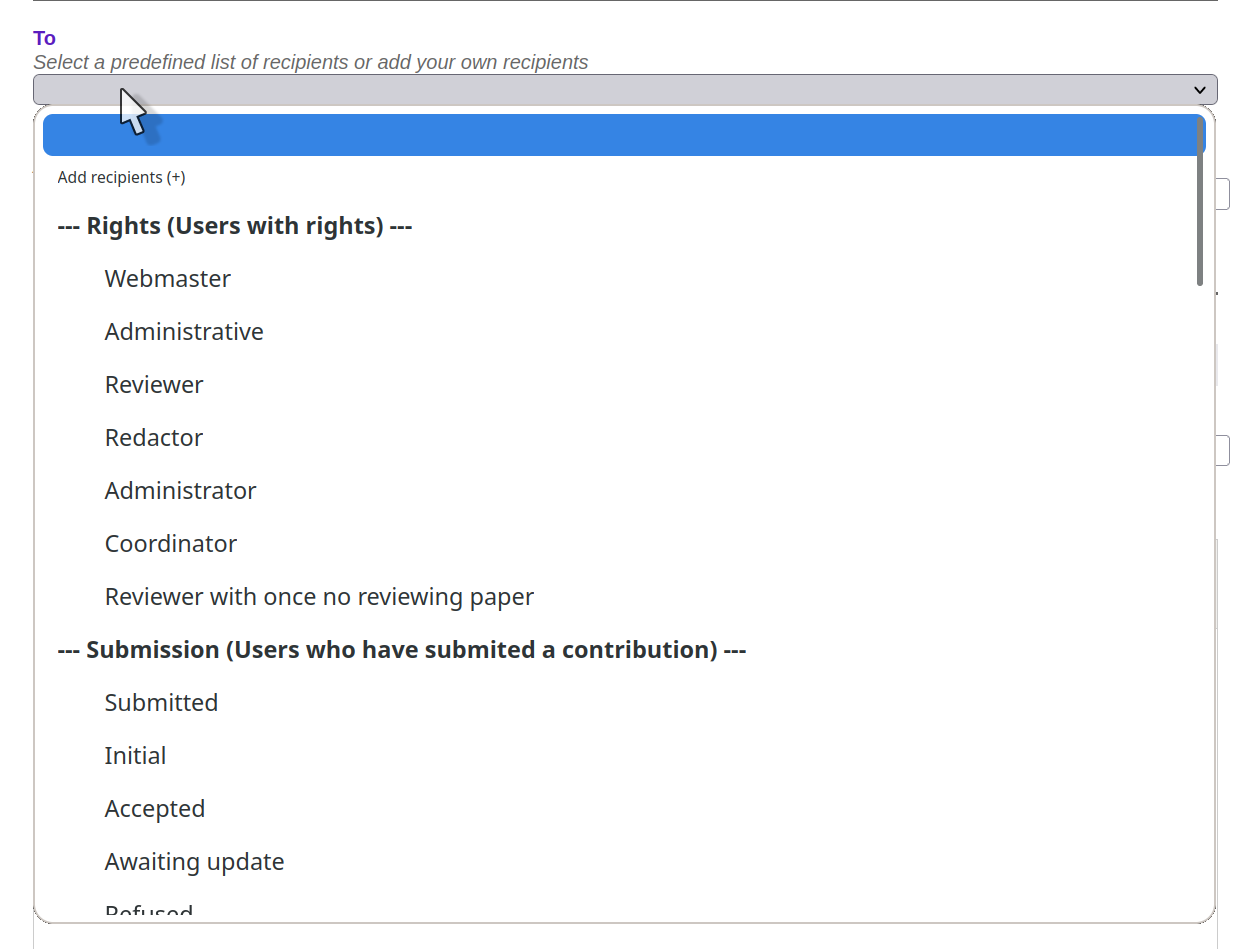
Click on “New list”, enter a title and add “free” recipients or recipients related to types created in Sciencesconf based on privileges, deposit or registrations.
If you choose to add new recipients, emails are manually entered into a predefined contact list. Each address is separated by a semicolon.

There is no procedure to import contacts from a csv file.
Remember to click on the line that appears “Add Recipient(s)”.
This new list will appear in the recipients in the Mailing feature.
Warning
SciencesConf is not a mailing list management system, the limit of emails to send is 500. Beyond the servers saturate. So prefer the use of a system of type Sympa.
Mailing
Sending emails is done in the section Mail management > Mailing.
Sending emails is divided into three parts: “A” (recipients), “Content” and “Options”.

Depending on your choice of recipients, you will have access to certain templates in the “Content” section.
In “A” you will find the recipient lists sorted by privileges, deposits, registration status and also your pre-defined lists. However, you can also add new recipients.
In the “Content“ section, you will find the predefined templates as well as your custom templates. You can choose a template or write your email directly using the text editor and HTML mode.
You will also have the option to attach a file with a maximum size of 200 MB.
Finally, in the third part “Options“, you can configure the sending of the email to the corresponding authors, to all administrators and acknowledgements of receipt.
Before sending, you can preview your message.
For each recipient, you will have access to the content of the email. If you have used one of the templates you will see tags being replaced by custom information.
In this space, you can delete one or more recipients and send.
For multi-lingual sites, the email language is the one defined by the “Interface default language” parameter chosen by the user in their account profile if it is part of the conference site languages.
Note
Emails appear in duplicate when previewing, because we display them in HTML and text mode. This allows rendering in both possible configurations of email clients.
History
In Email Management > History, you have access to all emails sent from the platform.
You can sort emails (by subject, recipient and date) using the arrows to the right of the column.
If you are looking for a specific email, prefer using the field «Search in the table».
Warning
The history does not allow to trace the history of the emails received, but that of the emails sent by the conference.