Manage registration
Note
Affected user: Administrator
If you have enabled the Registration management module, you will need to configure these features in order to open the public site.
Registration is configured in 2 stages:
– the general configuration of registrations
– the registration form for participants
Warning
you can change your registration form as long as there are no participants. If people have already registered for your conference, no changes to the form will be permitted.
General configuration of registrations
From the Registration management > 1 – Configuration menu, you have access to the general settings of registration.
You can therefore indicate the registration period during which the registration form will be accessible to future participants. Note that the dates entered here depend on those indicated in the Administration > General Settings menu.
Manual validation allows you to control each new registration made on the site. Similar to pre-registration, with this option, you will have to validate each registration with the checkmark so that future participants can access the payment. An email is then sent automatically to the participant.

From this menu, you can also choose to alert administrators by email to each new registration. This alert makes sense if you choose a manual validation of registrants.
Here you can finally determine the maximum number of participants at your event if you have logistical constraints.
Tip
It should be noted that the information in this menu can be modified even if registrants are saved.
The registration form
To set up the registration form, go to Registration Management > 2 – Form<. Anyone wishing to register must complete this form.
The form is divided into four main parts.
Mandatory information about the user account
These informations are mandatory and not modifiable, it is part of the information relating to the user’s Sciencesconf account.
Optional user account information
Some questions will be displayed, but not mandatory, these are additional informations. You can hide them if you wish.
Information on supervisory authorities
If you have enabled “Information on the affiliations of participants” in Step 1 – Setup, you will be able to make the Affiliate Information options mandatory for future participants.
The customizable registration form
Finally, the “Register form” section deals with customizable questions.
They are of several types. These fields can be removed with the cross, changed with the pencil, and moved relative to each other with the arrows to the left of each element.
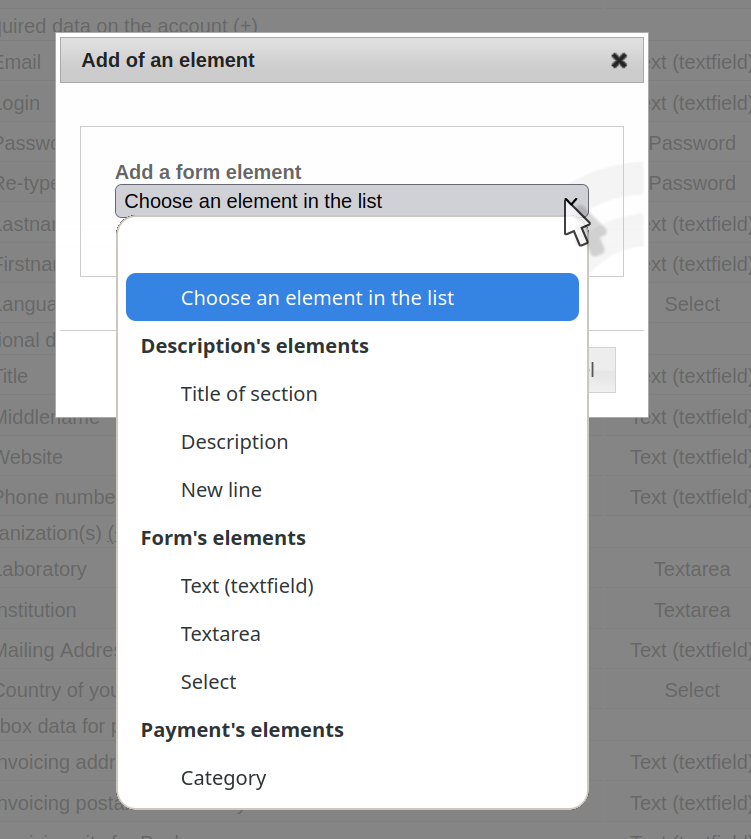
If you want to add customizable items, click “Add form item”.

There are three types of elements:
* The description elements* (title, description and line break) will help you organize your form
*Form elements* where the expected response is text, multi-line text, or a choice from a select list
*The payment element* (category) that will allow you to define the different categories of participants (for example student, researcher, speaker, delegate, guest, etc.) and assign them a specific price in step 3 - Payment ( see the tutorial )
The category element and drop-down list
The label will be the information visible to the user. If you want to complete the label, use the description field.
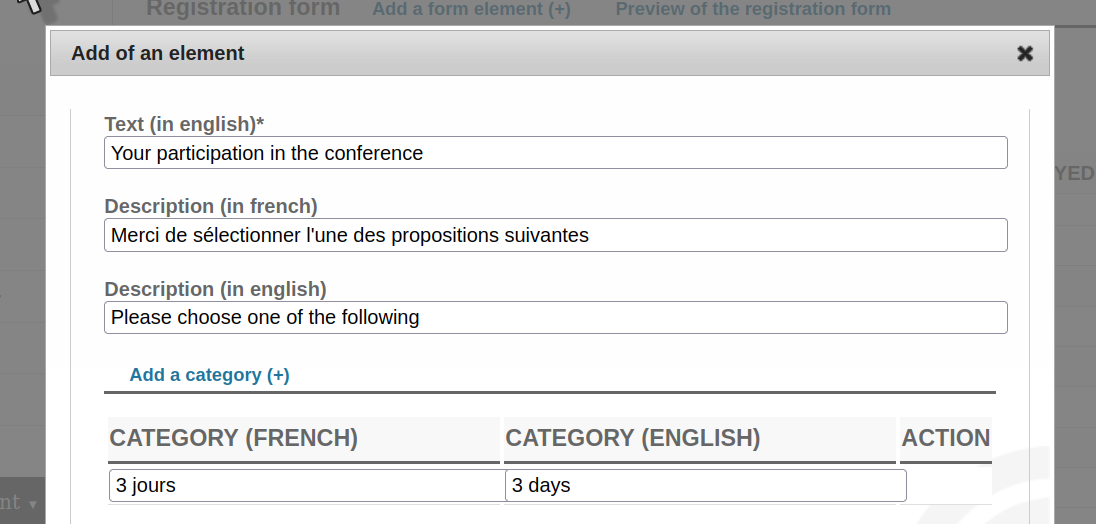
Once this item is added and saved, and you want to set different rates, go to the Registration management > 3 – Payment menu. Automatically your statuses (aka registrant categories) will be visible in the “Fee registration” part. All you have to do is add rates and choose the payment methods you want.
The form can be previewed by clicking on “Preview of the registration form“ displayed in blue beside “Registration form”.
If you want to add additional options (paid or not), you can add Drop-down List items. You can choose the “yes/no” type for a gala dinner, or a “personalized list” if it is a list of places to visit.
Each value will then correspond to a particular place.
If you have not activated the payment module, you can open your site.
If you have enabled payment, refer to the Payment setup page
To manage registrants, refer to the Participants page