Participants management
As a conference administrator or manager, you can perform various actions to manage registrations.
The manager has access to all registration tracking. By default, he visualizes the following actions:

View registrations
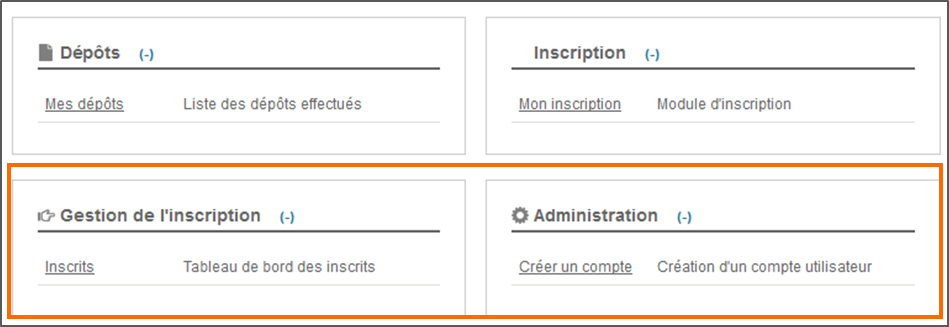
To view registrations, go to Registration management > Participants.
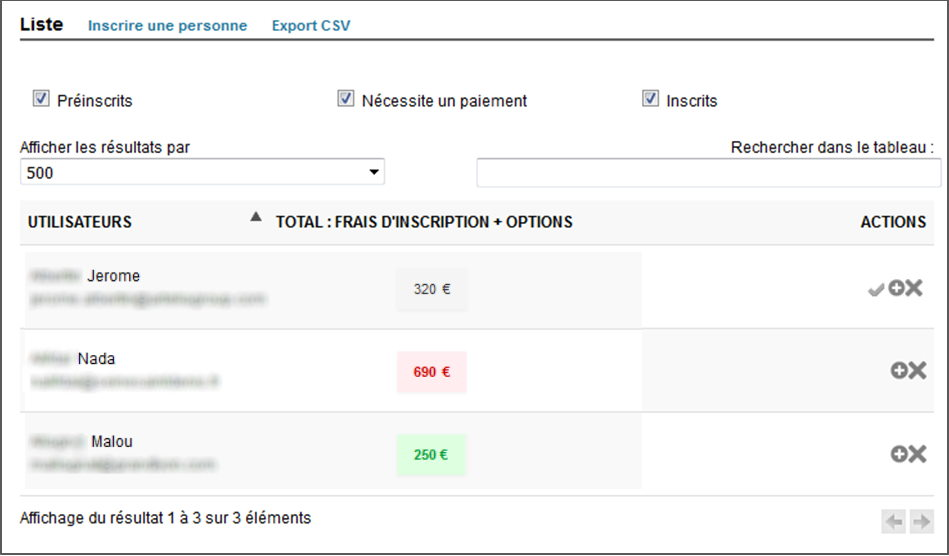
You will have access to the summary table of registrants presenting the participants, the amount of their fees, the status of their registration as well as the various possible actions on registration.

The color code will indicate the status of the registration:
Grey : registration to be validated by the manager (pre-registration) or invalid registration (account not validated, method of payment not chosen)
Red: payment pending, registration is in progress
Green: payment received, registration is final
Validate pre-registrations
To validate registrations, go to Registration management > Participants.
If the conference administrator has chosen the manual validation of registrants, you can validate these pre-registrations by clicking on the checkmark to the right of each registrant.

Management of registrations
If you want to edit the registration, go to Registration management > Participants and click on the + icon to the right of the registration line.

This action allows you to:
See information: view the registration form filled in by the registrant.
Validate registration: the validation of the registration is also done by this means (in addition to the check mark seen
Modify the payment information: you can change the payment method, send a confirmation email
Send a request for payment: if you click on this button, a payment request is automatically send by email to participants.
Edit information: you access the form and modify all the information related to this registration.
Delete a registration
If you want to delete a registration, go to Registration management > Participants and click on the cross to the right of the registration line.

Warning
Any deletion of registration is final!
Register a person
To register a person, they must have an account on Sciencesconf.org. If not, see “Create an account for a user”.
Tip
HAL or Episciences accounts can be used on the Sciencesconf.org. The login is also done using the username (login) and the associated password.
If you want to register an individual, go to Registration management > Participants and click on “Register someone”.

Start typing in your email ID or address or name to see a drop-down list that matches the information entered. Then select the desired user and click the Select button.
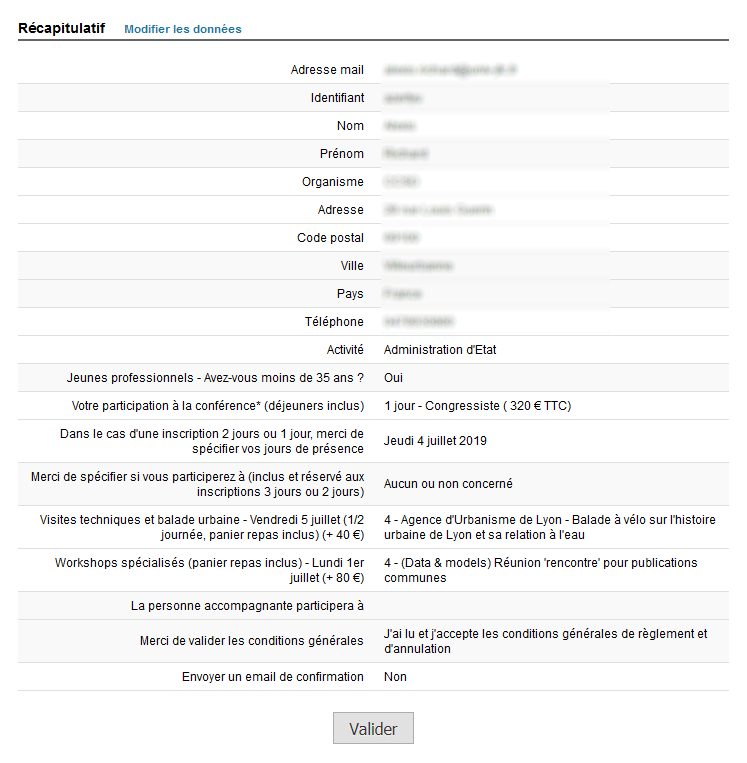
The registration form appears. Fill in at least all the mandatory information (indicated by an asterisk) before saving. You will then see a summary. If the information is correct, click Validate otherwise click Modify data.

After validation and, if your site allows, the person will automatically appear in the list of Particpants.
Export list of registrants
If you want to export the Registrants list, go to Registration management > Participants and click on “Export CSV”.
The export contains all the fields of the registration form as well as the status of the payment (one line per participant).
You can then use the exported data to edit badges or invoices as shown in Format a data export in Word.
Create an account for a user
If a user fails to register on your site, you have the ability to create an account. To do this, go to Administration > Create an account. Fill in all the required information and remember down the username and password.
The ID is a non-modifiable field and it will be up to you as a manager to communicate the ID and password to the person for whom you have just created an account. In this case, the person does not receive an email to validate the account creation. The account is automatically validated.